
 DeltaSnap
  DriveSync
  Noject
  DeltaSync
 Requirements
- macOS 14 Sonoma or later
- ~10 MB of disk space
- One or more external or internal volumes you wish to protect from accidental ejection.
Quick Start
Setting up Noject is a three-step process:
01. Install & Approve
Download Noject from the Mac App Store or our website.
If you've downloaded Noject from our website / Polar (our reseller and Merchant
for Record), extract the zip file and move the Noject.app to
/Applications folder in Finder. Download from the Mac App Store
directly installs at /Applications.
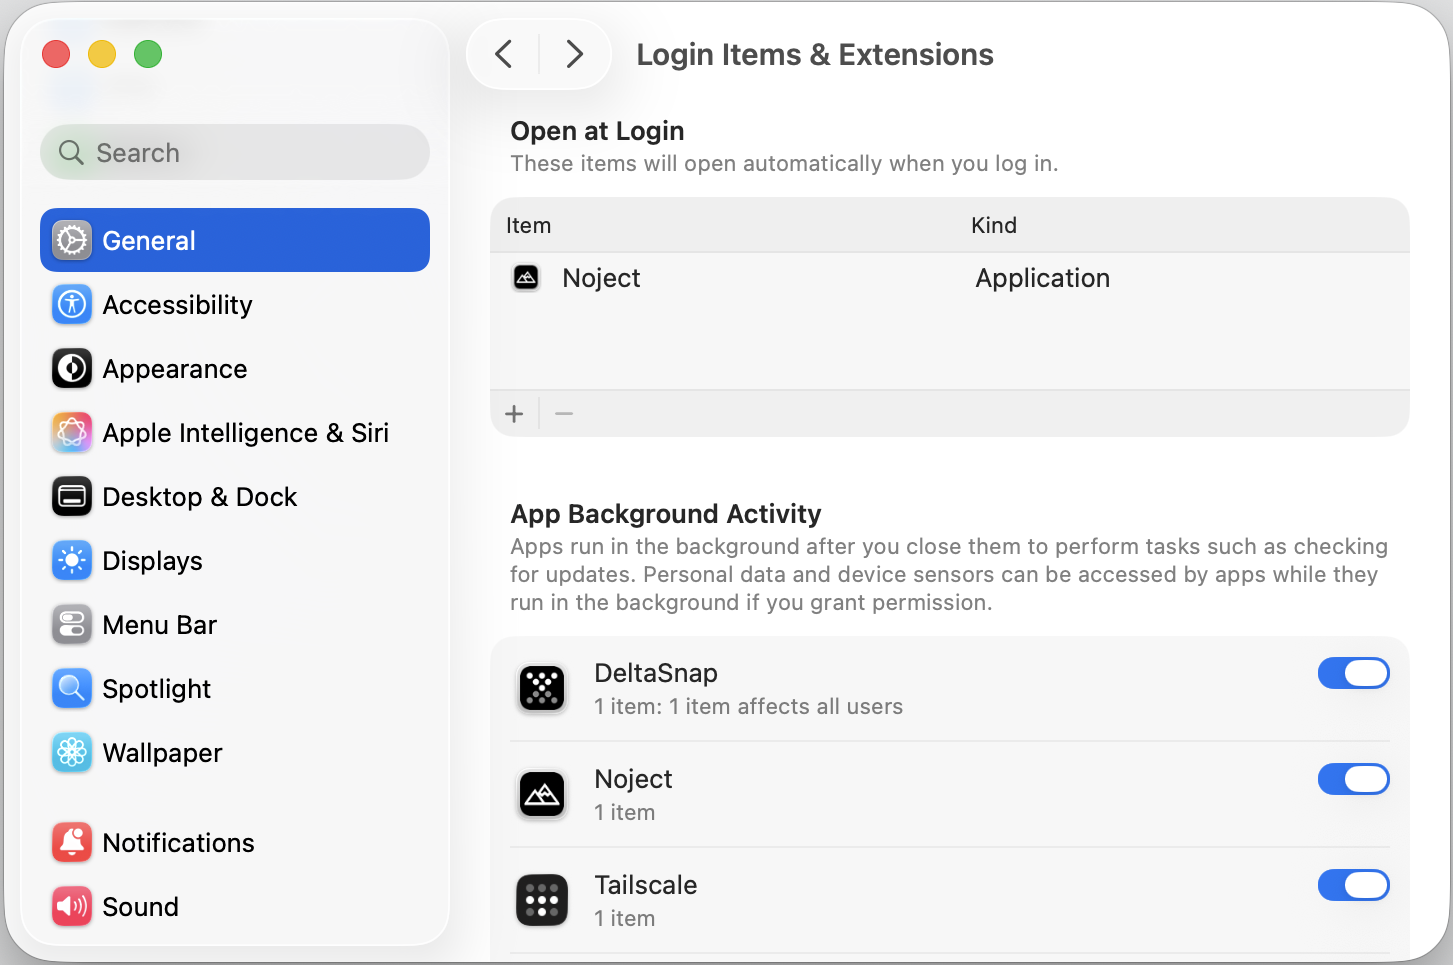
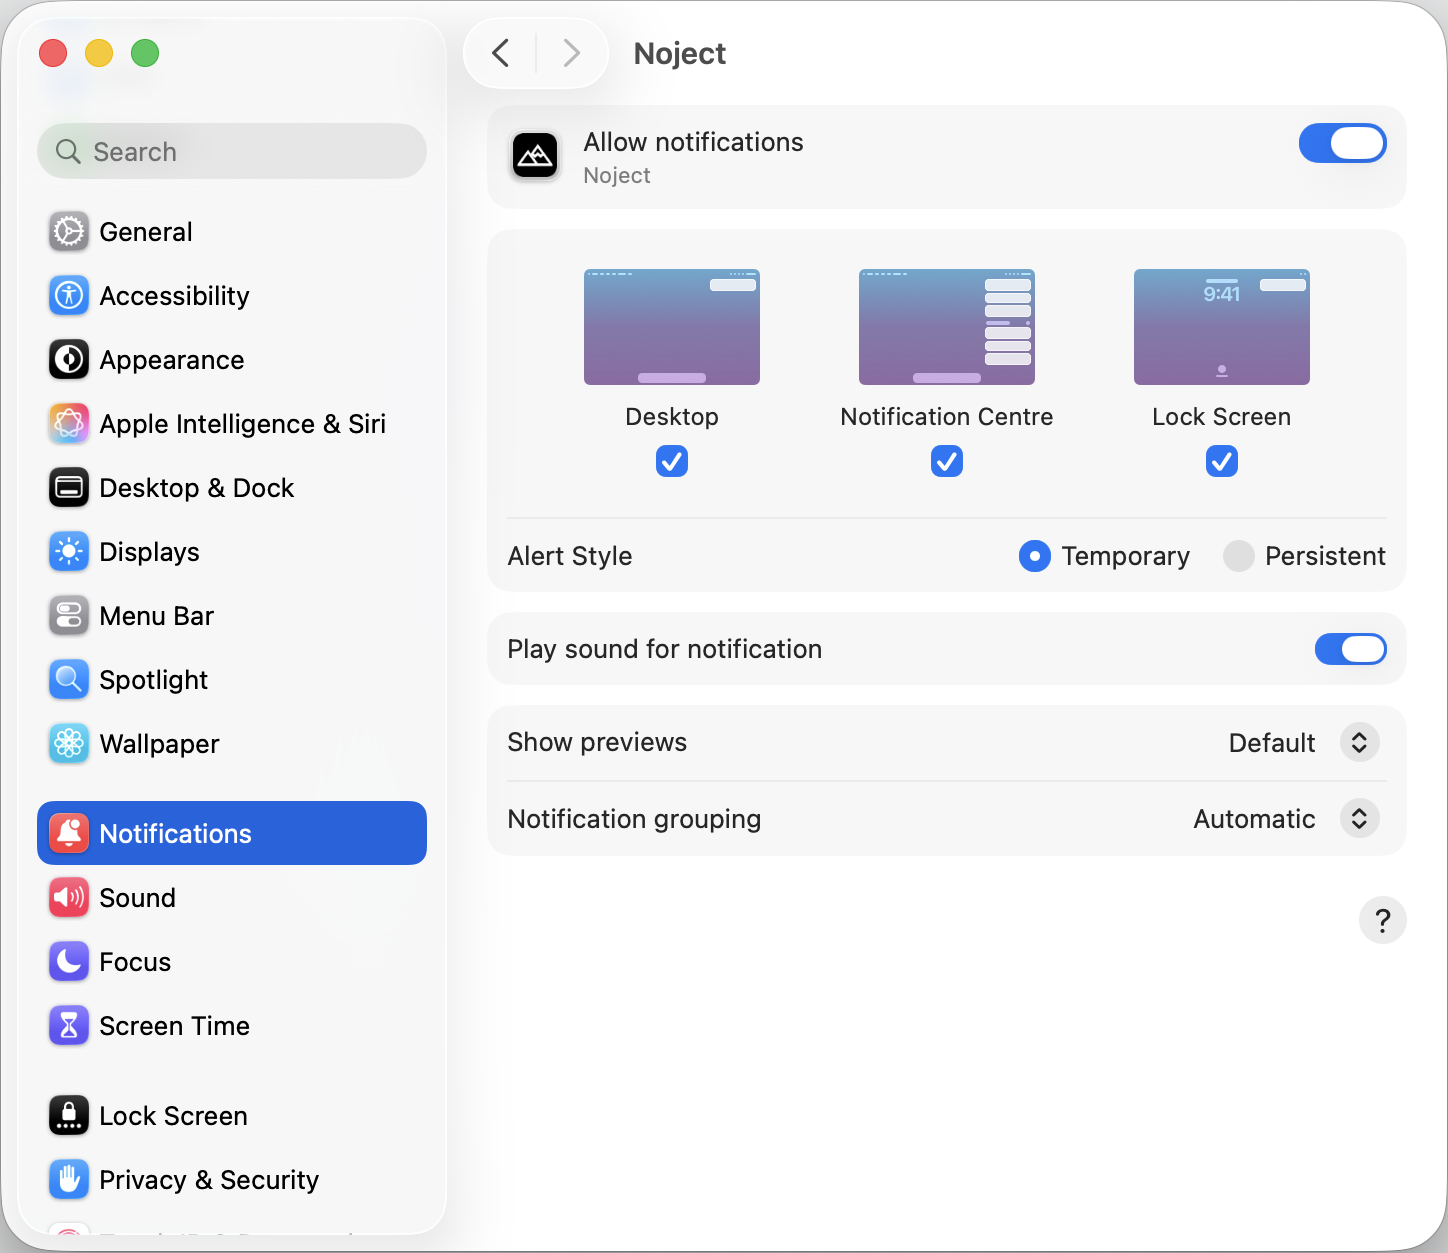
Launch the app, on most systems Noject automatically adds itself to your Login Items so it's always ready. It also enable its agent to run in background and may prompt you to allow notifications.

When that does not happen, it will prompt you with the issues to fix:
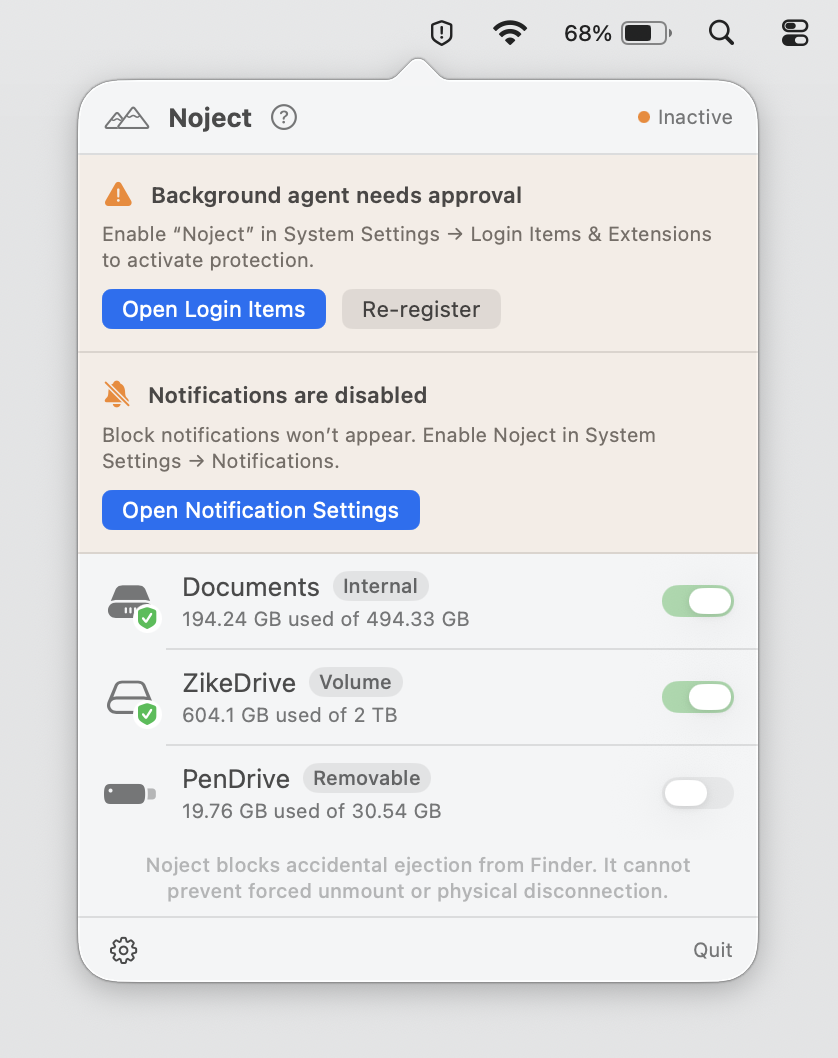
In which case, allow the Noject app to run in the background by going into the "Login Items & Extensions" under General section of the System Settings.
You may also allow notifications by the app by going into the Noject app under Notifications section of the System Settings.
02. Protect Volumes
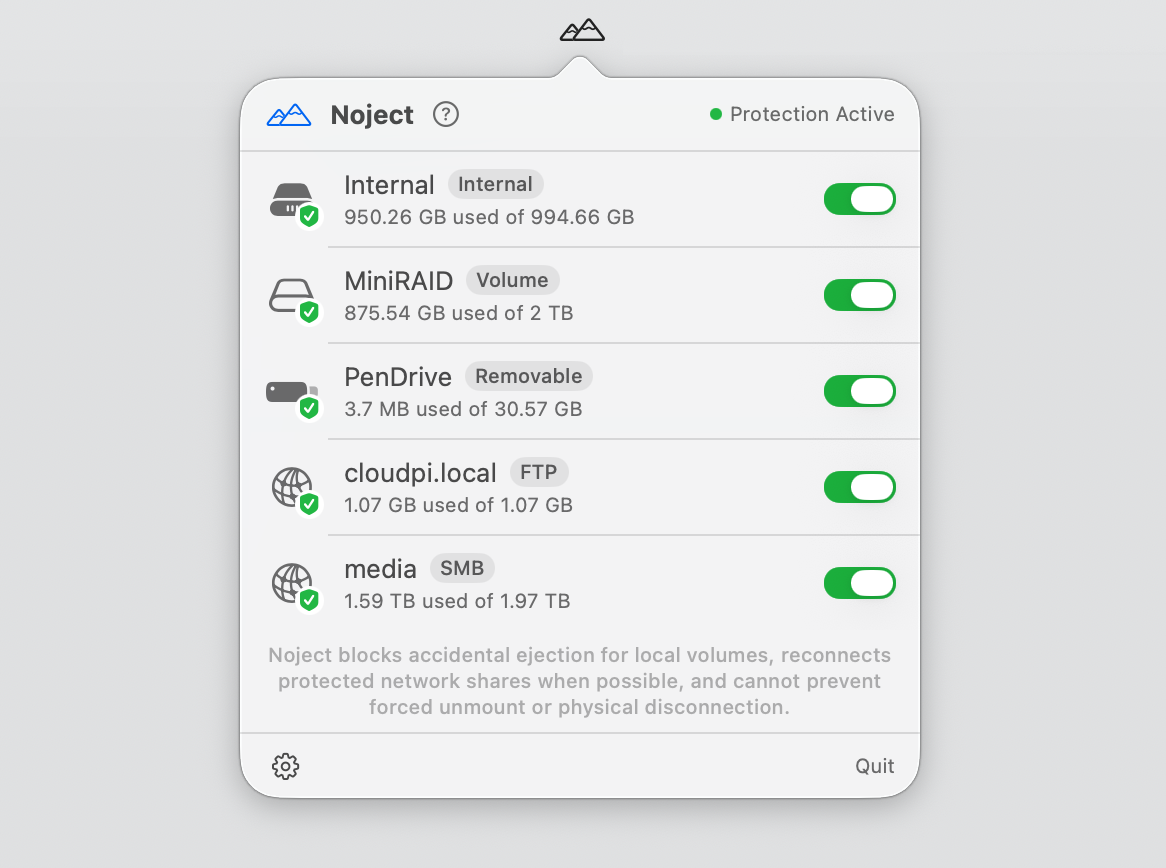
Click the Noject icon in your menu bar. You will see a list of all currently mounted volumes. Flip the switch next to the drives you want to shield. They are now protected from all ejection attempts.
03. Forget It
The background agent takes over. You may close the main UI and your volumes stay protected across reboots, sleep cycles, and re-plugs.

Please note: the background agent (unless disabled) will always protect accidental ejection of protected volumes but notifications will not be shown when the menubar app (UI) is closed.