Ceph Storage with CloudStack on Ubuntu/KVM
In this post, we look at how to deploy a Ceph cluster (v18 +) and then use that with Apache CloudStack and KVM on Ubuntu 22.04/24.04.
Host Configuration
Section titled “Host Configuration”In the this Ceph cluster, we’ve three hosts/nodes that serve as both mon and
osd nodes, and one admin node that is used to server as mgr and run the Ceph
dashboard.
    192.168.1.10 mgmt    # Admin/mgr and dashboard
    192.168.1.11 kvm1    # mon and osd
    192.168.1.12 kvm2    # mon and osd
192.168.1.13 kvm3 # mon and osdConfigure SSH config on admin or management node:
    tee -a ~/.ssh/config<<EOF
    Host *
        UserKnownHostsFile /dev/null
        StrictHostKeyChecking no
        IdentitiesOnly yes
        ConnectTimeout 0
        ServerAliveInterval 300
    EOF
Install cephadm
Section titled “Install cephadm”Newer Ceph versions recommend using cephadm to install and manage Ceph cluster
using containers and systemd.
Cephadm requirements include
python3, systemd, podman or docker, ntp and lvm2. Let’s install them on all
nodes:
sudo apt-get install -y python3 ntp lvm2 libvirt-daemon-driver-storage-rbdInstall podman:
    sudo apt-get update
    sudo apt-get -y install podman
Finally, configure the ceph repository (reef/v18 in this example) and install
cephadm and ceph-common on all the nodes:
    wget https://download.ceph.com/keys/release.asc -O /etc/apt/keyrings/ceph.asc
    wget -q -O- 'https://download.ceph.com/keys/release.asc' | sudo apt-key add -
    echo "deb [signed-by=/etc/apt/keyrings/ceph.asc] http://download.ceph.com/debian-reef/ $(lsb_release -sc) main" | sudo tee /etc/apt/sources.list.d/ceph.list
    apt-get update
    apt-get install -y cephadm ceph-common
If you install cephadm using wget, you can add specific release repos using:
cephadm install ceph-commonBootstrap Cluster
Section titled “Bootstrap Cluster”Bootstrap Ceph cluster by running the following only on the admin node (192.168.1.10 in the example):
    cephadm bootstrap --mon-ip 192.168.1.10 \
                      --initial-dashboard-user admin \
                      --initial-dashboard-password Passw0rdHere \
                      --allow-fqdn-hostname
On successful run, the above command will bootstrap a Ceph cluster with ceph
config in /etc/ceph/ceph.conf and SSH public key /etc/ceph/ceph.pub using
container images that are orchestrated by podman.
The dashboard will be available on the mon IP https://192.168.1.10:8443/ which
you can log in using the user admin and password as provided in the command
(Passw0rdHere in the example above).
Copy the ceph SSH public key across other nodes (from the admin/mgmt node):
    ssh-copy-id -f -i /etc/ceph/ceph.pub [email protected]
    ssh-copy-id -f -i /etc/ceph/ceph.pub [email protected]
    ssh-copy-id -f -i /etc/ceph/ceph.pub [email protected]
Add hosts
Section titled “Add hosts”Add hosts after disabling automatic mon deployment:
    ceph orch apply mon --unmanaged
    ceph orch host add kvm1 192.168.1.11
    ceph orch host add kvm2 192.168.1.12
    ceph orch host add kvm3 192.168.1.13
Add Monitors
Section titled “Add Monitors”Read more about monitors here.
Optional, specify monitor traffic/CIDR:
ceph config set mon public_network 192.168.1.0/24Add mons:
    ceph orch daemon add mon kvm1:192.168.1.11
    ceph orch daemon add mon kvm2:192.168.1.12
    ceph orch daemon add mon kvm3:192.168.1.13
Now, enable automatic placement of daemons:
    ceph orch apply mon --placement="kvm1,kvm2,kvm3" --dry-run
    ceph orch apply mon --placement="kvm1,kvm2,kvm3"
Add OSDs
Section titled “Add OSDs”Read more about OSD here.
List available physical disks of the added hosts:
ceph orch device lsThen, use the syntax to specify the host and device you want to add as OSD (for ex. if the device is /dev/sdb):
     ceph orch daemon add osd kvm1:/dev/sdb
     ceph orch daemon add osd kvm2:/dev/sdb
     ceph orch daemon add osd kvm3:/dev/sdb
Finally, you may check your osds across hosts with:
ceph osd treeDisable SSL on Dashboard
Section titled “Disable SSL on Dashboard”This is optional and more useful in test/homelab environments. To disable SSL on Ceph Dashboard when, for example, using inside an internal network:
    ceph config set mgr mgr/dashboard/ssl false
    ceph config set mgr mgr/dashboard/server_addr 192.168.1.10
    ceph config set mgr mgr/dashboard/server_port 8000
    ceph dashboard set-grafana-api-ssl-verify False
    ceph mgr module disable dashboard
    ceph mgr module enable dashboard
Now, the dashboard is accessible over http://192.168.1.10:8000/
Tuning Ceph Cluster
Section titled “Tuning Ceph Cluster”Refer https://docs.ceph.com/en/latest/start/hardware-recommendations/#memory
For example, configure per OSD memory limit and MDS cache memory limit to 2GB each (or as required):
    ceph config set osd osd_memory_target 2G
    ceph config set mds mds_cache_memory_limit 2G
You confirm the value using the ceph config get <key> <config> command, for example:
    ceph config get osd osd_memory_target
    ceph config get mds mds_cache_memory_limit
    ceph config get mon public_network
Ceph and CloudStack
Section titled “Ceph and CloudStack”Check Ceph status using the following command (or using the Ceph dashboard):
ceph -s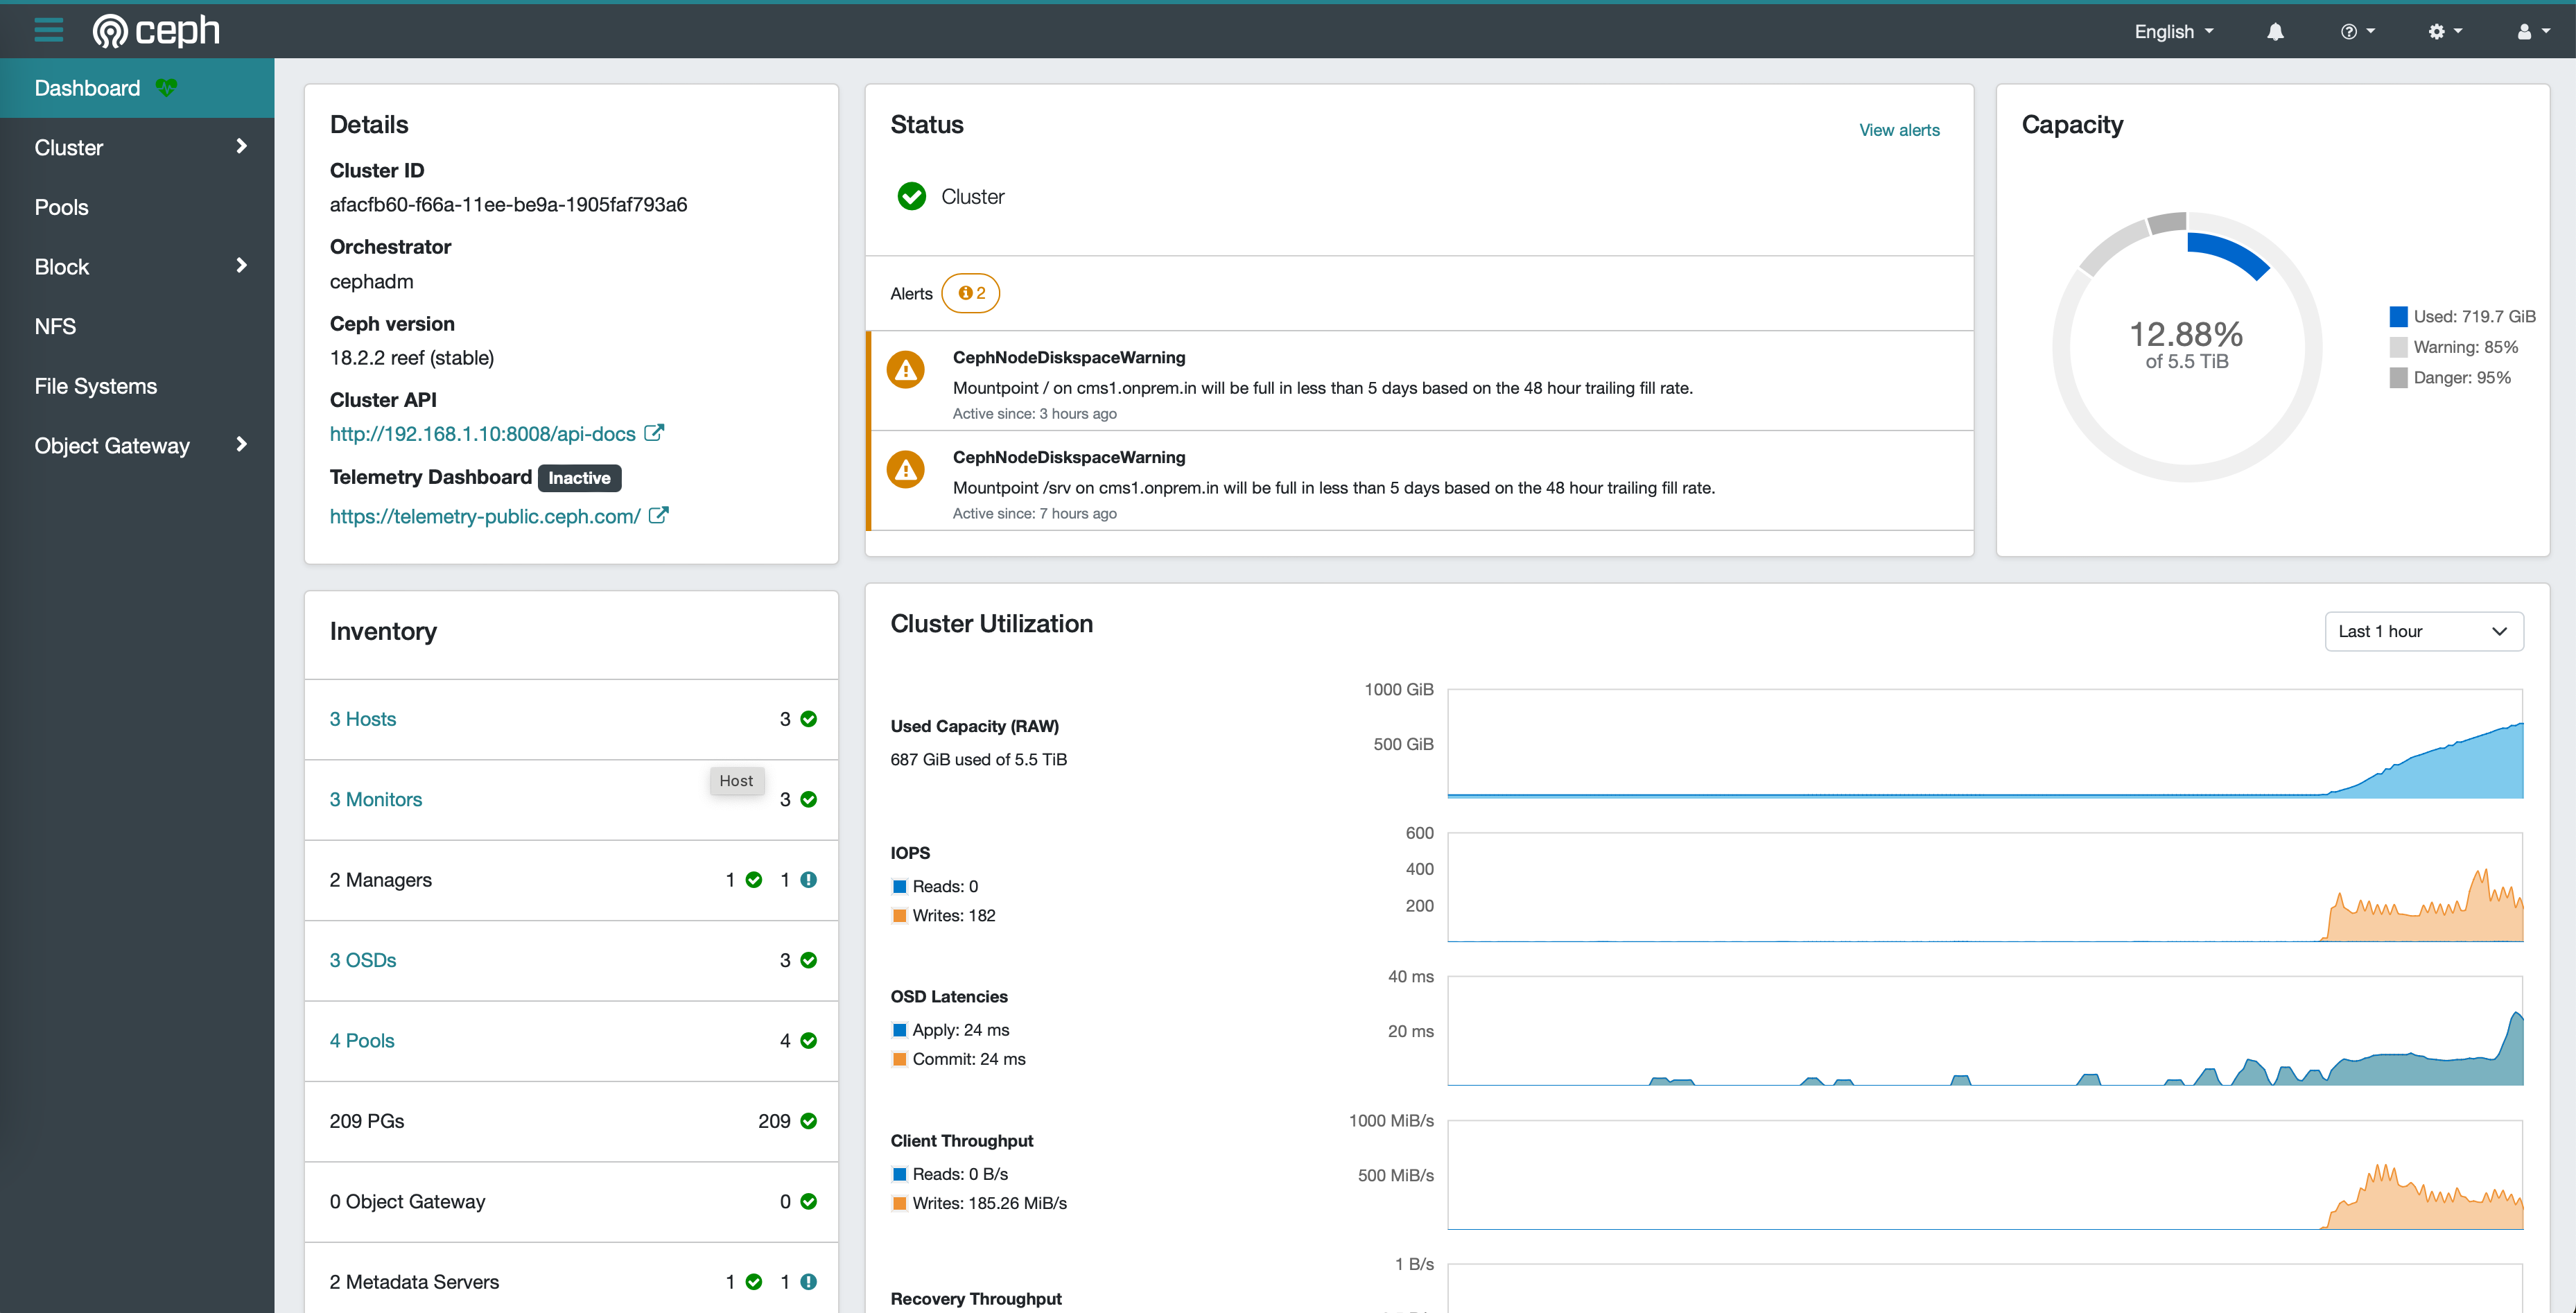
Once you’ve ensure your Ceph cluster is up and healthy, let’s create a new Ceph pool and add to CloudStack:
    ceph osd pool create cloudstack 64 replicated
    ceph osd pool set cloudstack size 3
    rbd pool init cloudstack
Next, create a dedicated auth key for this pool:
ceph auth get-or-create client.cloudstack mon 'profile rbd' osd 'profile rbd pool=cloudstack'Finally, you can add this pool as a CloudStack zone-wide Ceph primary storage
using the above credential as RADOS secret for the user cloudstack as well
specify the monitor domain or IP with a storage tag. For example:
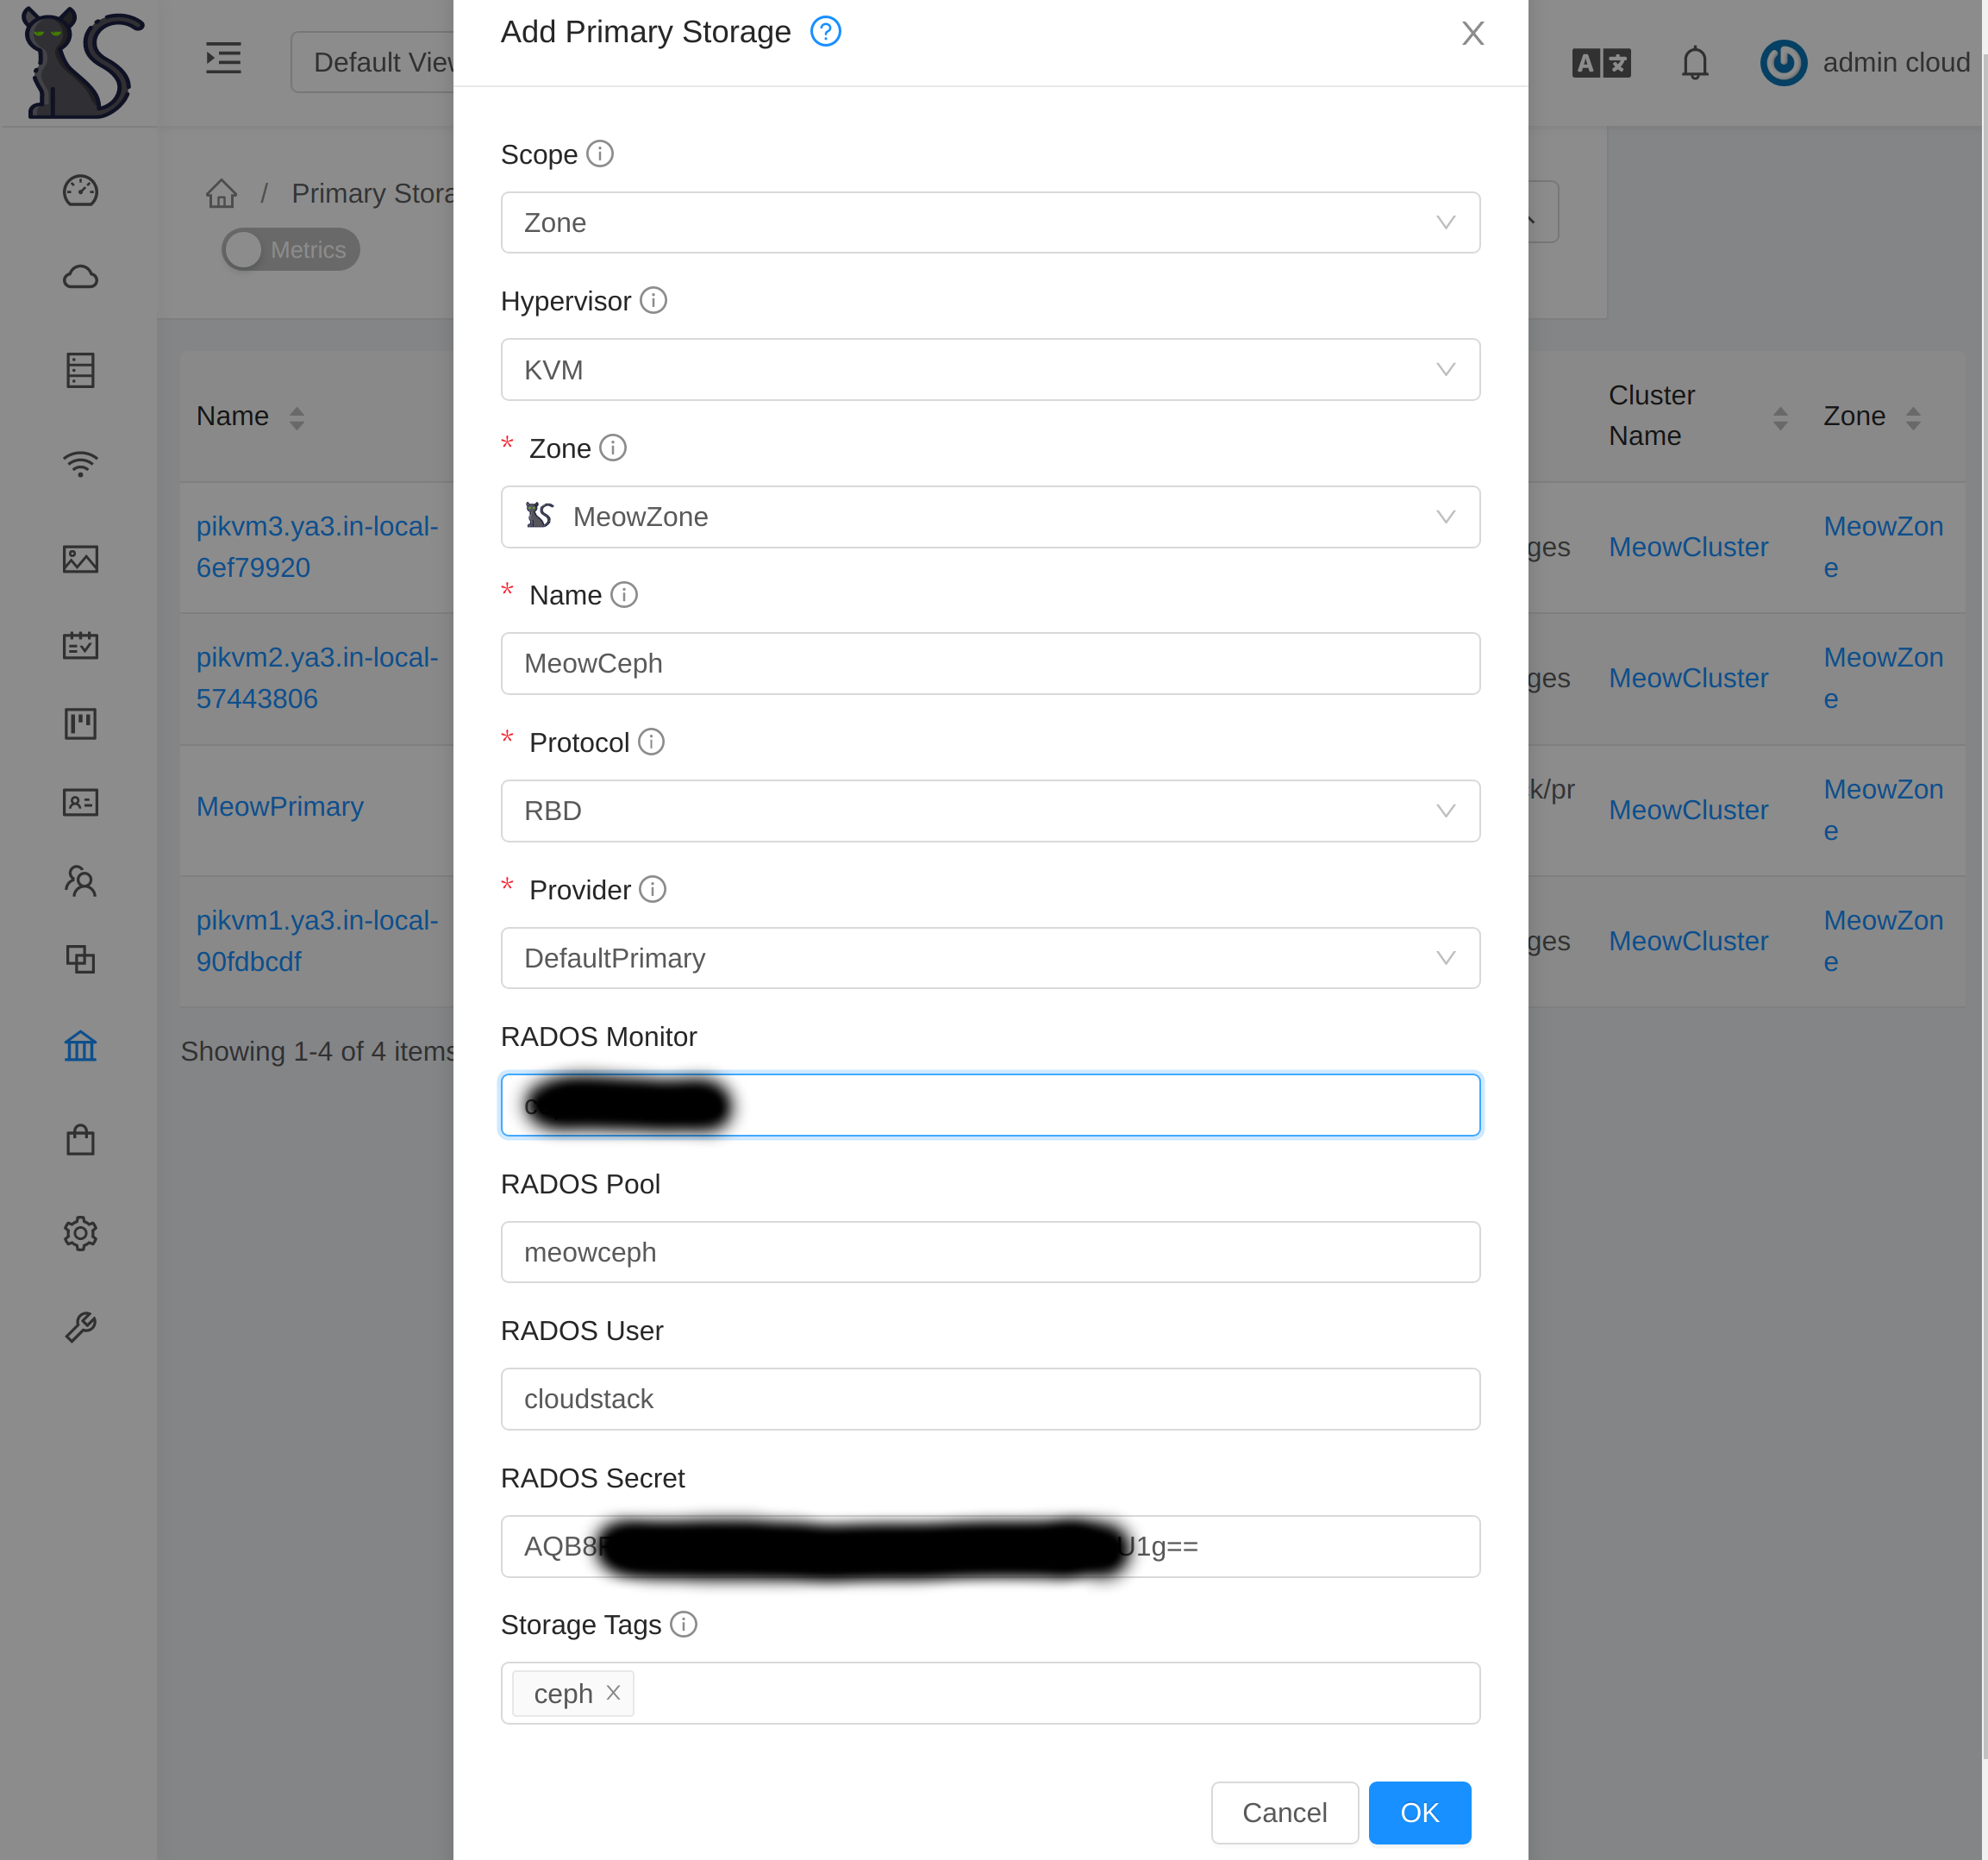
Next, you can create specific compute and disk offering with the same storage tag so VM deployments would use your newly added Ceph storage pool.
CephFS
Section titled “CephFS”CephFS is a POSIX-compliant file system over RADOS. I’ve started using CephFS as a distributed-shared directory for storing documents and photos which along with rsync allows me to keep all my home computers in sync with each other.
To create a CephFS (say with the name cephfs), simply run:
ceph fs volume create cephfsThat’s it!
Now to mount and use CephFS on your client/computer, you can either use Ceph
FUSE or on Linux environment simply use the kernel based module. For that
install ceph-common:
sudo apt-get install ceph-commonAuthorise client on the mon host and save output as config on the client host at
/etc/ceph/ceph.client.rohit.keyring (replace rohit with username of your choice:
sudo ceph fs authorize cephfs client.rohit / rwNow, you can mount your CephFS named cephfs using (replace rohit with username of your choice:
sudo mount -t ceph 192.168.1.11:6789:/ ceph -o name=rohit,secret=<password secret without quotes>